- Platform
- IONIX title
- IONIX category
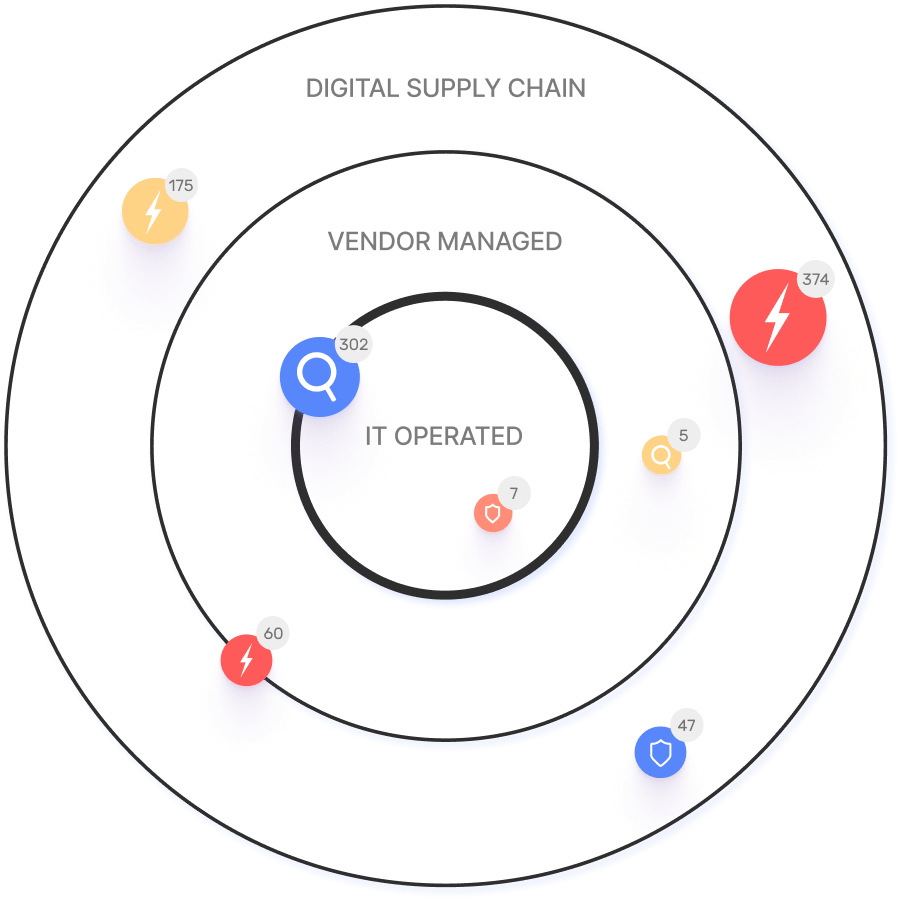
- IONIX domain (AKA asset)
- IONIX incident description
- Technical data
- IONIX Solution
Cortex XSOAR
The IONIX content pack allows you to seamlessly receive all your IONIX Action Items and supportive information into Cortex XSOAR, and thus create and view dashboards, create custom alerts, streamline remediation and improve investigations. Integration between IONIX and Cortex XSOAR makes use of REST API.
Cortex XSOAR Integration Guide
IONIX can export incidents and relevant information directly to Cortex XSOAR. The integration involves having the Cortex XSOAR make calls to IONIX API endpoints in order to retrieve the information. Thus, you will need to enter the IONIX Server URL as well as a valid IONIX API key to Cortex.
The server URL is https://<your portal’s name at IONIX >.ionix.com, e.g., https://hportal.ionix.com
Generating a new API key:
1. Log into the IONIX portal
2. Click the API Settings button
3. Provide a name for the token, specify if the token is read-write or read-only (only the latter is necessary), and set an expiry date.
4. Click “Create Token”
5. Copy the generated token to a secure file. You’ll need it later.
Configuring your Cortex XSOAR:
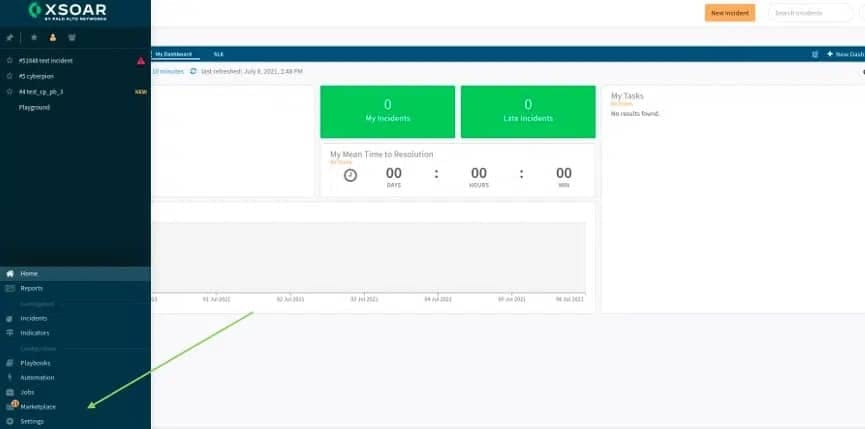
1. Head to the XSOAR Marketplace:

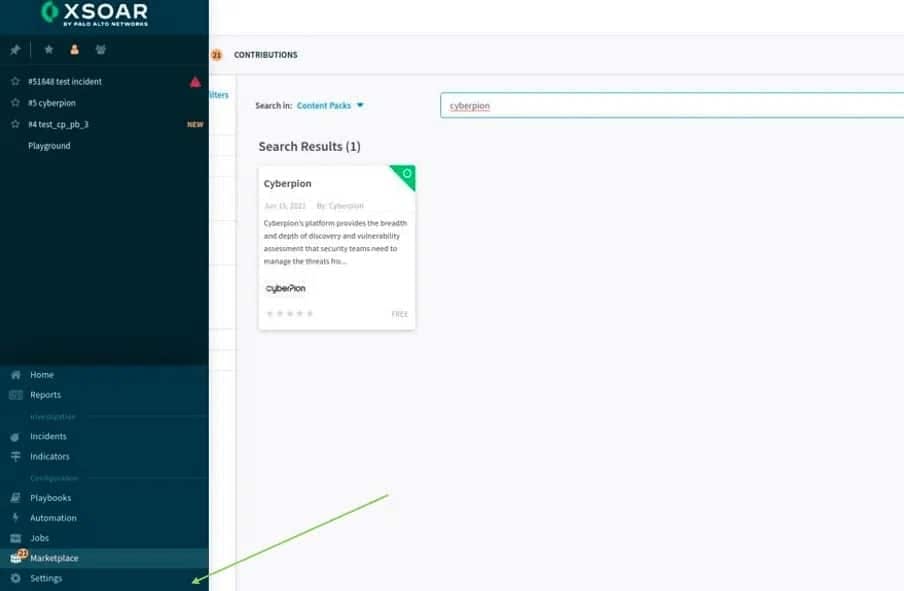
2. Find and install IONIX:
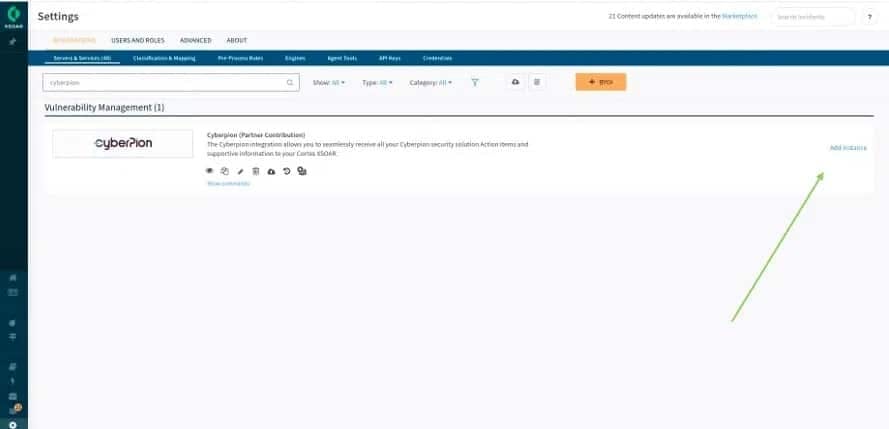
3. Go to Settings:
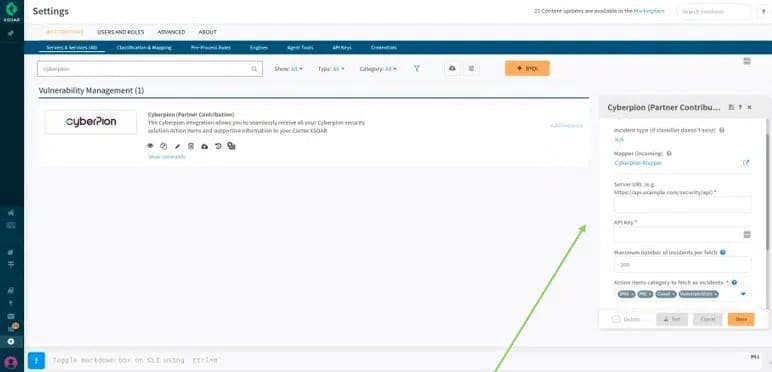
4. Search for IONIX and click on “Add Instance”:
5. Fill in the server URL and API key that were provided by the IONIX portal (located within setting -> Integration settings):
6. Form field names, explanations and tips:
Field Explanation Fetches incidents Should be checked (this determines whether to get IONIX’s action items from the server)
Make sure “Fetches incidents” is enabledDo not fetch Should be false Classifier Should be (by default) IONIX – Classifier Incident type (if classifier doesn’t exist) Should be (by default) N/A Mapper (incoming) Should be (by default) IONIX – Mapper Server URL Paste here the IONIX URL as described above API Key Paste here the IONIX API key as described above Maximum number of incidents per fetch Determines how many action items are fetched every minute The default is set for 200 and we recommend leaving it as such Action items category to fetch as incidents Action items categories to fetch
Options are DNS, PKI, Cloud and Vulnerabilities
Default is set to include all Action Item typesShow only active issues We recommend that this checkbox be markedIf not enabled, closed issues (resolved action items) will be fetched in addition to the active ones Trust any certificate N/A Use system proxy settings N/A Do not use by default N/A 7. After clicking “save”, Action items will start to appear at the ‘incidents’ section:
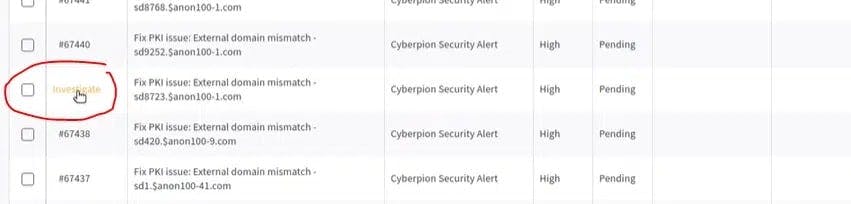
8. Cortex XSOAR pulls Action Items at a rate of 200 every minute until all Action Items are uploaded
9. Click on “Investigate” to see the Action Item details:
10. Action Items will include the following information:
11. Playbook
The playbook added within this content package will allow you to request additional information relating to the Action Items that were reported, in order to help with context, investigation, and effective remediation.
The default playbooks intention is basic, it allows the user to create customized playbooks and/or connect the offered playbook template to a more general playbook.
Users can view the playbook within an incident by clicking the “Work Plan” tab and following the steps presented: